Revamp Your Living Space: How to Renovate a House While Living in It Without Losing Your Sanity
Renovating your home can be a rewarding experience, transforming your living space into a dream come true. But what if you need to continue living in the house during the renovation? Fear not! With proper planning and a few essential strategies, you can revamp your living space and maintain your sanity while living amidst the construction chaos. Let’s embark on this journey together and discover how to renovate a house while living in it, making your live-in renovation a success.
Key Takeaways
- Navigate your home renovation safely and comfortably with essential strategies.
- Create a temporary kitchen, livable space amidst construction, daily schedule & professional relationship with contractors to manage noise/dust for a good night’s sleep.
- Maintain family life during renovation by meal planning, creating safe play zones for children & ensuring pet safety while making the most of outdoor spaces.
Navigating Your Home Renovation: Essential Strategies
Undertaking a home renovation requires prioritizing safety, minimizing dust and debris, and safeguarding your furniture and personal belongings. Above all, preserving a comfortable and restful living environment for you and your family, especially in spaces like the master bedroom, is paramount.
This blog post presents three key strategies for a comfortable stay in your home during a renovation: setting up a make-shift kitchen, creating habitable spaces despite construction, and controlling noise and dust to secure a sound night’s sleep.
Establishing a Temporary Kitchen
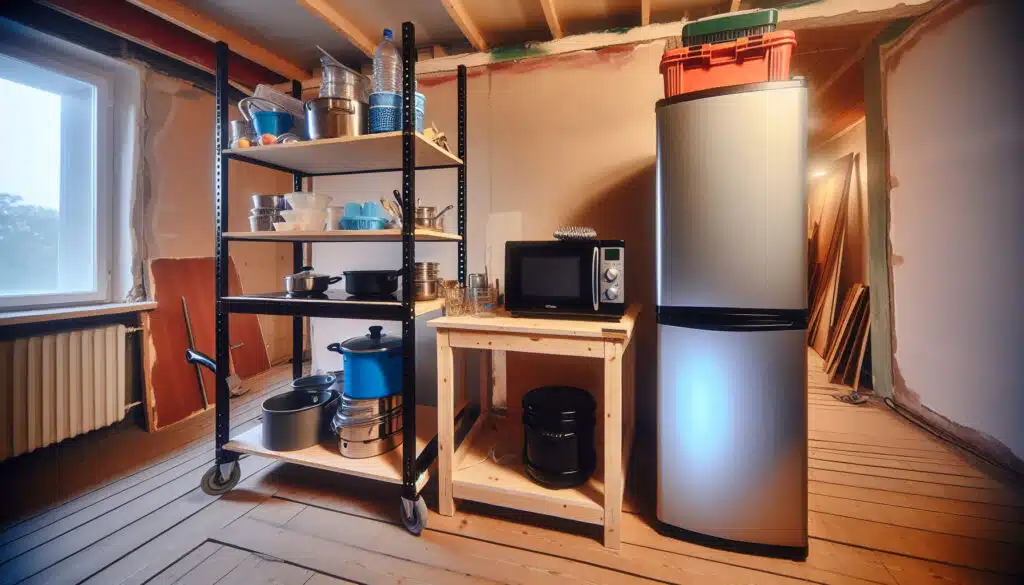
A major kitchen overhaul may deprive you of a functional cooking area for a long duration. Arranging a make-shift kitchen could significantly help in preserving a semblance of normalcy during the renovation. Here are some tips to consider:
- Stock up on non-perishable items, disposable plates, and cutlery.
- Gather recipes that can be easily prepared with portable appliances like electric skillets.
- Consider using your mini fridge, bathrooms, or even your yard for cooking and cleaning, avoiding interference with the construction workers’ tasks.
To save money and reduce your dependence on local restaurants, consider saving money by converting your dining room into a comprehensive area for food preparation, storage, and dining. Adjust your menu to include more lightly processed foods and utilize temporary storage solutions for perishable items. Embrace the challenge and adapt to your new culinary environment, knowing that your dream kitchen is just around the corner.
Designing a Livable Space Amidst Construction

Residing in a construction zone necessitates innovativeness and adaptability. Here are some tips for making the most of your space during renovations, ensuring you have at least one room for your daily activities:
- Reassign non-renovated living areas for varied uses, such as offering alternative dining and lounging spaces.
- If your main living room is inaccessible, relocate your home entertainment system to another room.
- Should your children’s bedroom be off-limits, have them bunk downstairs and host sleepovers.
Ensure your family’s safety by implementing the following measures:
- Set up temporary barriers to keep them away from the dust, noise, and hazards of the construction site.
- Create alternate routes for your family to use during construction.
- Discuss containment and clearing procedures with your contractor, including the use of HEPA vacuums, air filters, and protective equipment for workers.
A positive, professional relationship with your contractor will help you achieve project success and meet deadlines.
Managing Noise and Dust for a Good Night’s Sleep

Undisturbed sleep is pivotal during a renovation, and controlling noise and dust is key to ensuring it. Here are some tips to help you achieve a better sleep experience:
- Install dust barriers to control dust in the air.
- Schedule work hours that minimize noise disruptions during rest times.
- Relocate beds to less noisy and more hygienic areas of the house.
Remember, your comfort and well-being are important, and these temporary adjustments will make such a difference, ensuring a more enjoyable renovation process.
Don’t forget to communicate your noise and dust concerns with your contractor. They can advise on the best methods for noise management and dust containment, ensuring a safe and comfortable environment for you and your family throughout the renovation project.
Smart Scheduling and Communication with Your Renovation Team
Unambiguous and regular communication with your renovation team is a cornerstone for a successful house renovation project. This blog post will cover the following:
- The significance of establishing a daily routine
- Cultivating a professional rapport with contractors
- Updating family members on the renovation progress, timelines, and safety measures.
Creating a Daily Schedule
Synchronizing your daily routine with your contractor is key to a hassle-free renovation experience. Work together to establish a schedule that accommodates both parties’ needs, including the possibility of evening or non-peak hour work. This will help minimize disruption to your family’s daily routines and ensure a more efficient renovation process.
Plan the renovation in phases and communicate with the team to schedule work in a way that minimizes disruptions to your everyday life. Utilize shared spreadsheets and calendars to ensure all pertinent information is accessible to everyone, and provide family members with ample time to adjust their schedules accordingly. These steps will aid in creating a harmonious renovation experience for all parties involved.
Building a Professional Relationship with Contractors
Cultivating a professional rapport with your contractor is instrumental to the success of your live-in remodel. Here are some tips to help you maintain a positive working relationship:
- Maintain open communication
- Set clear expectations
- Foster trust by discussing project requirements and timelines
- Regularly check in with your contractor
- Respect your contractor’s time and availability
By following these tips, you can ensure a smooth and successful remodeling project.
Keep communication lines open and address any concerns promptly. If you have worries about the project’s appearance during the intermediate stages, inquire with your contractor for clarification before making complaints or requesting changes.
A strong relationship with your contractor will ensure a smooth renovation experience and a successful project outcome.
Keeping Family Members Informed
It’s important to keep family members updated about the renovation progress, timelines, and safety measures. Create a clear renovation schedule that is easily accessible and understood by all family members, and provide ample reminders as the project nears. This will ensure everyone is aware of the ongoing work and any potential disruptions to their daily routines.
Provide family members with contact information for the building company or contractors involved in the renovation project. This will enable them to ask questions or address concerns directly with the professionals working on the project. Keeping your family informed will help maintain a sense of order and understanding during the renovation process.
Maintaining Family Life During Renovation
Preserving your family life during a renovation can pose challenges, but with meticulous planning and thoughtfulness, one can sustain a semblance of normalcy. This blog post will cover strategies for meal planning and food storage, crafting safe play zones for children, and guaranteeing pet safety and comfort during the renovation.
Meal Planning and Food Storage
During a renovation, your regular meal planning and food storage routines may be disrupted. Here are some tips to help you manage your food supply during this time:
- Stock up on non-perishable items.
- Utilize coolers for temporary food storage.
- If you find yourself with excess food, consider donating it to local charities. Make sure the food is non-perishable or unspoiled perishable.
This way, you can contribute to your community while managing your food supply during the renovation.
For meal planning, consider clean-eating meal plans, healthy meal delivery services, and freezer meals that can be prepared ahead of time. These options will provide you with easy and nutritious meals throughout the renovation process, reducing the need for eating out and helping you maintain a balanced diet.
Safe Play Areas for Children
Designing safe play zones for children during a renovation is central to their safety and well-being. Here are some steps to follow:
- Designate a specific room or area of the house for your children to play in.
- Enforce clear boundaries to keep them away from the construction zone.
- Ensure that your children have a safe space to enjoy while you focus on the renovation tasks at hand.
To enforce these boundaries, communicate clearly with your children and involve them in setting the rules. Post the rules in a visible place, and follow through with consequences for crossing the boundaries. By taking these steps, you can create a safe and enjoyable play experience for your children during the renovation.
Ensuring Pet Safety and Comfort
The safety and comfort of your pets should also be prioritized during a home renovation. Here are some tips to ensure their well-being:
- Temporary relocation may be necessary to ensure their well-being.
- If relocation is not possible, designate specific areas of the house for your pets to roam, eat, and sleep.
- Monitor their stress levels throughout the renovation process.
Keep the construction team informed about your pets’ customary roaming areas, frequenting spots, feeding areas, and preferred toileting spots. This will help the team take necessary precautions when working in those areas and minimize the risk of accidents or injuries to your pets.
Making the Most of Outdoor Spaces
Take advantage of the outdoors during your renovation by constructing outdoor living spaces and employing temporary structures. This can provide you with additional living spaces and help you enjoy the outdoors while your home is being transformed. Consider incorporating furniture pieces like pergolas, gazebos, and canopies to create comfortable outdoor spaces for relaxation and entertainment.
To further maximize your outdoor spaces, adopt a camping mindset and plan your renovation during a time of year typically conducive to outdoor activities. This way, you can enjoy the fresh air and natural surroundings while your home is being renovated, making the process more enjoyable and less disruptive to your daily life.
Personal Care and Coping Mechanisms
Self-care and managing renovation-induced stress are as important as overseeing the project itself. Maintain a positive attitude, find distractions, and practice self-care to help you stay focused and motivated throughout the renovation process. Remember, your mental and emotional well-being is essential for a successful renovation experience.
Visualizing the end result of your renovation project can also help you maintain motivation and focus on the positives. Imagine the improvements to your living space and the sense of accomplishment you’ll feel once the renovation is complete. Keep this vision in mind as you navigate the challenges and disruptions of the renovation process.
Selecting the Right Contractor for Your Live-in Remodel
Selecting the appropriate contractor for your live-in remodel is a pivotal factor for a successful renovation experience. When selecting a contractor, consider the following:
- Experience
- Licensing
- Insurance
- Communication skills
- Established networks of reliable trade partners, subcontractors, and tradespeople
A dependable design-build contractor who emphasizes integrity and openness throughout the entire project is essential for a successful renovation while residing in the house, ensuring a safe and efficient job site.
Take the time to research and interview potential contractors, asking for references and examples of their previous work. By selecting a contractor who aligns with your project goals and communicates effectively, you can ensure a smoother renovation experience and a finished project that meets your expectations.
Celebrating Milestones and Visualizing the Finish Line
While managing your live-in renovation, it’s beneficial to commemorate milestones and envisage the project completion. Recognizing and rewarding yourself for each milestone achieved can make the challenging task of home renovation more enjoyable and gratifying. Take progress pictures to document the transformation and monitor the project’s advancement, and use them as motivation to keep moving forward.
Visualizing the completed project can also have numerous psychological benefits, such as stimulating motivation, reducing anxiety, and fostering a sense of anticipation and excitement. Keep your eye on the prize and remember that, with each milestone reached, you’re one step closer to enjoying your newly renovated living space.
Summary
In conclusion, renovating your living space while living in it may seem daunting, but with proper planning, communication, and adaptability, it’s possible to achieve a successful renovation and maintain your sanity. By implementing essential strategies, maintaining family life, maximizing outdoor spaces, and practicing personal care, you can navigate the renovation process with confidence and ultimately enjoy the rewards of your transformed living space.
Frequently Asked Questions
How do I live in my house while renovating?
Can you live in a house while doing an addition?
How to renovation a house?
How can I create a safe play area for my children during a renovation?
What should I consider when selecting a contractor for my live-in remodel?
Revamping Your Space: How Long Does It Take to Replace Kitchen Cabinets?
Are you considering a kitchen makeover? One of the most impactful ways to transform your space is by replacing your kitchen cabinets. However, you may be wondering, “how long does it take to replace kitchen cabinets?” Fret not, as this comprehensive guide will walk you through the factors that influence cabinet replacement time, the steps involved, and the advantages of hiring professionals versus tackling it as a DIY project.
Key Takeaways
- Time to replace kitchen cabinets can be affected by size, layout and type of cabinet.
- Professional installation is essential for a successful outcome. Expertise and experience are critical components.
- DIY vs professional comparison helps the reader make an informed decision about their project.
Factors Influencing Cabinet Replacement Time
The time it takes to replace kitchen cabinets can be influenced by several factors, such as kitchen size and layout, the type of cabinets, and existing conditions or unforeseen issues. Understanding these factors can help you set realistic expectations and prevent unnecessary delays, ensuring a smoother cabinet replacement experience.
So, what exactly are these factors, and how do they impact the timeline? We will examine each factor in more detail.
Kitchen Size and Layout
The size and layout of your kitchen play a significant role in determining the time needed for cabinet replacement. Naturally, larger kitchens with more cabinets will take longer to complete than smaller ones. Additionally, the complexity of the layout can affect the installation time. For instance, if the layout requires reconfiguring or the installation of custom cabinets, the process may take longer than simply replacing standard cabinets in the same layout.
Efficiency in both small and large kitchens can be achieved through proper coordination and planning.
Custom vs. Standard Cabinets
Custom cabinets offer a unique design and features tailored to your space, but they typically take longer to install than standard base cabinets. This is because they require fabrication and customization to meet specific measurements and design requirements. On the other hand, standard cabinets come pre-manufactured and are available as ready-to-assemble or pre-assembled options, which can be installed more quickly. Depending on your choice, the type of cabinets can affect the overall timeline of your kitchen renovation.
Existing Conditions and Unforeseen Issues
Unforeseen issues, such as uneven walls or floors, can add extra time to the cabinet replacement process. Structural imperfections in older homes or substandard craftsmanship in newer builds may present challenges that were not anticipated during the planning stages. Complications can be avoided and a successful outcome ensured if these issues are identified and addressed before installation.
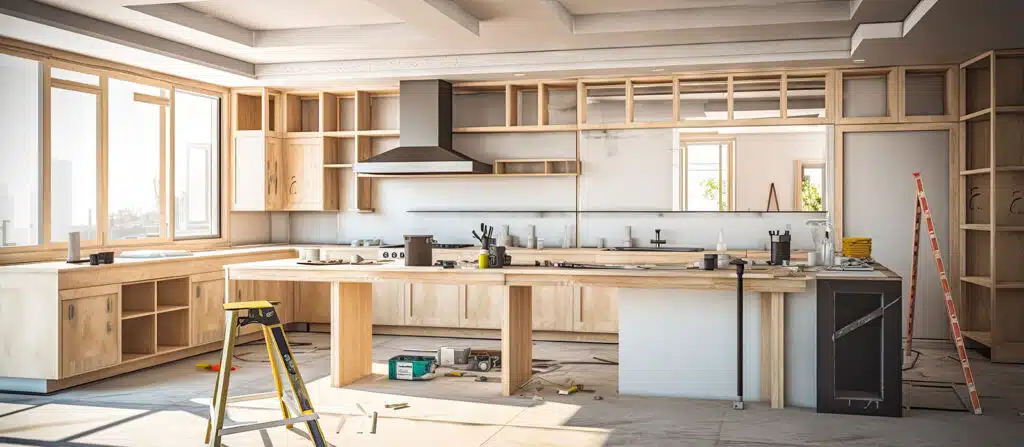
The Cabinet Replacement Process
Replacing kitchen cabinets involves a series of steps, from design and planning to removal of old cabinets and install kitchen cabinets. Being aware of these steps can help you manage your expectations and ensure a smoother process.
We will examine each phase of the cabinet replacement process and its specifics.
Design and Planning
A well-designed and planned kitchen cabinet layout is crucial for both functionality and aesthetics. During this phase, the following steps are taken:
- Accurate measurements of the space are taken.
- A layout is designed, keeping in mind factors such as storage, natural light, and appliance placement.
- The type and style of cabinets to be installed are chosen based on your needs and preferences.
Proper design and planning set the foundation for a successful cabinet replacement project.
Removing Old Cabinets
Before installing new cabinets, the old ones must be removed. This can be time-consuming, especially if they are difficult to disassemble or if there is damage to the walls or floors. The typical procedure involves unscrewing the hinges from the cabinet, so the hinge remains connected to the door, and then detaching the cabinets from the wall.
Doors and drawer fronts are also unscrewed from the cabinet body. Properly removing old cabinets helps prevent damage to the surrounding area and ensures a smoother installation process for the new cabinets.
Installing New Cabinets
The process of installing cabinets requires precision and attention to detail. Professionals use specialized tools and techniques to ensure the new cabinets are level, plumb, and properly aligned. Cabinet installation takes a few hours or a few days, depending on factors such as the size of the kitchen, the number of cabinets, and any unexpected issues encountered during the process.
For a durable and functional final product, the installation must be of high quality.
Hiring Professionals: Cabinet Makers and Installers
While DIY cabinet replacement might be tempting, hiring professional cabinet makers and installers can provide numerous benefits. These experts have the expertise, experience, and tools necessary to ensure a high-quality result and efficient project timeline.
We will discuss the benefits of working with professionals in greater depth.
Expertise and Experience
Professionals have the expertise and experience to handle any challenges that may arise during the cabinet replacement process. Their knowledge of materials, installation techniques, and problem-solving skills can ensure a successful outcome. Additionally, experienced professionals can predict and resolve potential issues that may not be apparent to someone without their level of expertise.
This expert knowledge results in a smoother, more successful cabinet replacement.
Time Management and Efficiency
Professional cabinet installation contractors are skilled at managing time efficiently, ensuring the project stays on schedule. They follow established processes and work collaboratively with their team to complete the installation in a timely manner. This efficiency can help minimize delays and disruptions, allowing you to enjoy your new cabinets sooner.
Quality Assurance
Quality assurance is a priority for professionals, ensuring your new cabinets are installed correctly and built to last. They follow stringent quality control measures and utilize the best materials and techniques for the job. This attention to detail and commitment to excellence can give you peace of mind that your cabinet replacement project will result in a beautiful and durable finished product.
Partial Kitchen Renovation Projects
Partial kitchen renovation projects, which involve updating cabinets and appliances without altering the overall layout, can present unique challenges. A partial kitchen renovation project may require additional coordination and planning to ensure a successful outcome. We will discuss the factors involved in partial kitchen renovations and their potential impact on the timeline and process of replacing cabinets.
Working with Existing Appliances and Countertops
If you plan to keep your existing appliances and countertops during a partial kitchen renovation, you’ll need to coordinate the cabinet replacement process accordingly. This can impact the timeline, as you’ll need to work around these existing elements while ensuring a seamless integration of the new cabinets.
Proper planning and communication with professionals are key to successfully navigating this challenge.
Coordinating Electrical and Plumbing Work
When replacing cabinets in a partial kitchen renovation, coordinating electrical and plumbing work is crucial. This involves understanding the requirements for new appliances, sinks, and lighting fixtures and working with licensed electricians and plumbers to ensure the work is done safely and up to code.
Proper coordination can help prevent delays and ensure a smooth cabinet replacement process.
Managing Project Delays
Project delays, such as material shortages or scheduling conflicts, can be frustrating during a partial kitchen renovation. To manage these delays, it’s important to maintain open communication with professionals, remain flexible, and have contingency plans in place.
Proactive planning can help minimize the impact of project delays and keep your renovation on track.
Tips for a Smooth Cabinet Replacement
Now that we’ve explored the various factors and considerations involved in replacing kitchen cabinets, let’s discuss some practical tips to help ensure a smooth process. By preparing the space, setting realistic timelines, and communicating effectively with professionals, you can minimize disruptions and achieve the kitchen of your dreams.
Preparing the Space
Preparing the space is a necessary step before beginning the cabinet replacement process. This involves:
- Removing all items from the existing cabinets
- Clearing out the kitchen to provide ample room for the professionals to work
- Taking steps to protect your appliances and flooring during the process to prevent damage and ensure a cleaner, more efficient project.
Setting Realistic Timelines
The establishment of realistic timelines helps in managing expectations and reducing stress during the project. Be sure to account for factors such as kitchen size, layout, and cabinet type when estimating the time it will take to complete the cabinet replacement.
Additionally, allowing for extra time to address any unforeseen issues can help prevent frustration and ensure a successful outcome.
Communicating with Professionals
Clear communication with professionals is key to addressing any concerns or issues that may arise during the cabinet replacement process. Be sure to ask questions, provide detailed information about the project, and maintain regular contact with the professionals throughout the process.
Open and clear communication can help ensure that your project stays on track and results in a beautiful and functional finished product.
Comparing DIY vs. Professional Installation
If you’re still on the fence about whether to tackle cabinet replacement as a DIY project or hire professionals, it’s important to weigh the pros and cons of each approach. Consider factors such as time commitment, cost savings, and quality of the finished product when making your decision.
We will analyze these factors in detail to help you make a well-considered decision.
Time Commitment and Learning Curve
DIY cabinet replacement can be time-consuming, particularly for those with little to no experience in this area. The learning curve involved in acquiring the necessary skills and knowledge can also add to the overall time commitment, especially when dealing with wall cabinets.
While DIY installation may initially seem more cost-effective, the potential for mistakes and delays should be taken into account.
Cost Savings vs. Potential Mistakes
While DIY cabinet installation can offer cost savings by eliminating labor costs, it’s important to consider the potential for mistakes that could lead to additional expenses. Errors in measurement, installation, or material selection can result in costly repairs or replacements down the line.
Hiring a professional ensures a higher quality finished product and may ultimately prove more cost-effective in the long run.
Quality of Finished Product
The quality of the finished product can vary significantly depending on the skill level of the DIY installer compared to a professional. A qualified and experienced professional will be able to properly assemble and install cabinets, ensuring a precise and professional finish. Conversely, an inexperienced or unskilled installer may have difficulty with proper alignment, leveling, and overall craftsmanship, leading to a lower quality installation.
It’s important to consider the potential impact on the finished product when deciding between DIY and professional installation.
Summary
To sum up, replacing kitchen cabinets is a significant undertaking that requires careful planning and consideration of various factors. By understanding the factors that influence cabinet replacement time, following a detailed process, and weighing the pros and cons of DIY vs. professional installation, you can make an informed decision that best suits your needs and preferences. With proper preparation and the right approach, you can achieve a beautiful and functional kitchen that will last for years to come.
Frequently Asked Questions
How long does it take to remove and replace kitchen cabinets?
How hard is it to replace kitchen cabinets?
How long does it take to get cabinets from cabinets to go?
How long does a kitchen remodel take?
What are the advantages of hiring professional cabinet makers and installers?
Renovating a Bathroom: What to Do First for a Flawless Remodel
Imagine transforming your outdated bathroom into a stunning oasis, complete with modern fixtures and finishes. With the right approach, renovating a bathroom – what to do first? This step-by-step guide will walk you through the process of renovating your bathroom, from identifying your goals and assessing the current space to choosing materials and obtaining necessary permits. Let’s dive in!
Key Takeaways
- Identify your goals and priorities for a successful bathroom renovation.
- Assess the current space to identify structural issues, fixture conditions, and layout changes.
- Choose materials & fixtures carefully while staying within budget & hiring professionals when needed!
Identify Your Goals and Priorities

As you prepare for your bathroom renovation, establishing your goals and priorities becomes an important first step. What do you want to achieve with this project? Are you looking for a cosmetic upgrade, a complete overhaul, or a bathroom makeover? Creating a bathroom remodel checklist from clear objectives can lead to a successful bathroom remodel while avoiding costly mistakes.
We can categorize these goals into three main areas: aesthetic goals, functional goals, and budget constraints.
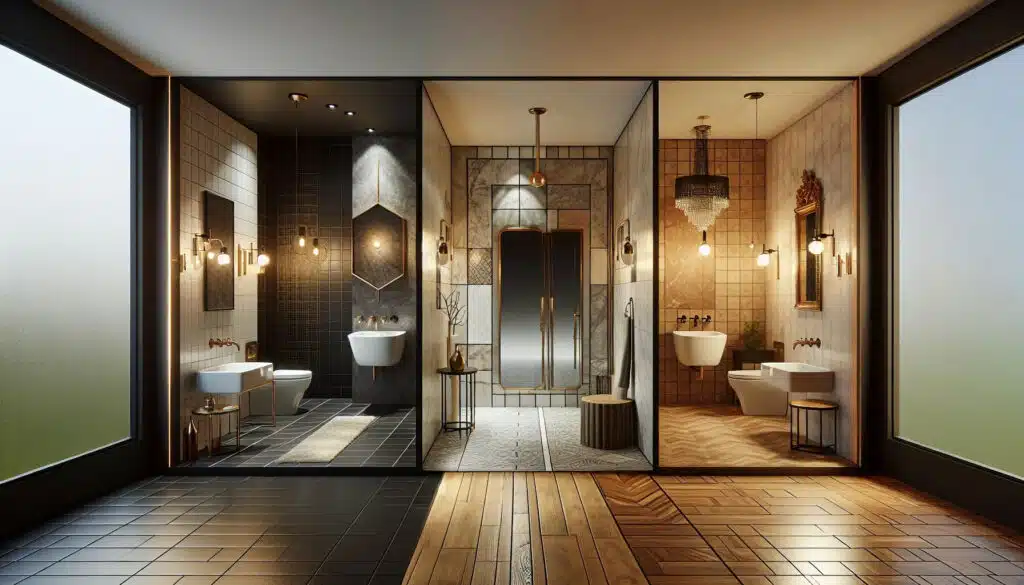
Aesthetic Goals
An aesthetically pleasing bathroom, especially a master bathroom, can significantly impact your daily routine and the overall value of your home. When considering the desired look and feel of your new bathroom, think about the color schemes, materials, and design elements you want to incorporate to create your dream bathroom. Visiting local home improvement stores or browsing online galleries can provide inspiration and help narrow down your choices.
For example, you may opt for a modern design with sleek lines, minimalist fixtures, and a calming color palette. Or perhaps a traditional style with warm wood tones and classic details is more your taste. Ultimately, the choice is yours, and the possibilities are endless.
Functional Goals
While aesthetics are important, functionality should never be overlooked. A well-designed bathroom must meet your practical needs, making life easier and more enjoyable. Consider aspects such as storage, layout, and fixture upgrades when setting your functional goals. For example, you may want to increase storage with a new vanity, improve lighting for better visibility, or upgrade your shower stall for a more luxurious experience. Incorporating bathroom design ideas that focus on both aesthetics and functionality will ensure a successful renovation.
Clear functional objectives will result in a bathroom that’s not just beautiful, but also efficient and user-friendly.
Budget Constraints
Budget constraints play a significant role in determining the scope and outcome of your bathroom renovation. Establishing a realistic budget will help you make informed decisions about materials, fixtures, and whether to hire professionals or tackle the project on your own.
Keep in mind that the average bathroom remodel cost is around $10,753. However, this number can vary based on factors such as project scope, material quality, and labor costs. It’s also wise to allocate 5-10% of your total budget for contingencies, as unexpected expenses can arise during bathroom remodels.
Assess the Current Space
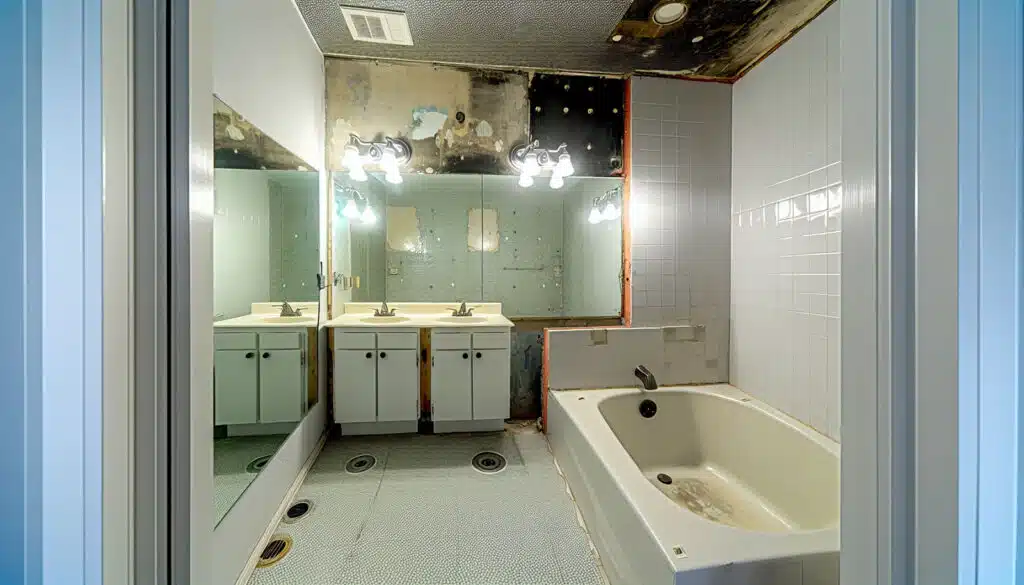
Having set your goals and budget, you can now assess your current bathroom space. This crucial step involves evaluating structural issues, fixture conditions, and potential layout changes. Understanding the existing state of your bathroom will help guide your renovation decisions and ensure a smoother process.
We will delve deeper into these assessment categories.
Structural Issues
Addressing structural issues is vital for a safe and long-lasting renovation. Examine your bathroom’s electrical wiring, plumbing, and insulation to identify any potential problems. If issues are discovered, they may require additional work and budget allocation.
Assessing structural issues can help avoid potential hazards and contribute to a successful renovation.
Fixture Condition
Evaluating the condition of your existing bathroom fixtures is essential to determine which items need repair, replacement, or upgrading. Examine the toilet, sink, bathtub, and other fixtures for signs of wear or damage. This will help you decide whether to replace certain fixtures or simply upgrade them to better suit your new bathroom design.
Layout Changes
Considering layout changes can significantly improve the functionality and flow of your bathroom space. If your current layout isn’t meeting your needs or you simply want a fresh look, explore options such as relocating fixtures, adding or removing walls, and changing the overall design. Keep in mind that some layout changes may involve adjustments to plumbing and electrical wiring, so be prepared to factor in these additional costs and considerations.
Develop a Project Timeline
Once your goals and priorities have been set and your current space assessed, you can move on to developing a project timeline. Creating a well-defined timeline is critical for keeping your renovation on track and ensuring a successful outcome. Consider factors such as contractor scheduling, material ordering, and contingency planning when developing your timeline.
A clear schedule prepares you better to manage each phase of the renovation process.
Contractor Scheduling
If you’re working with contractors, coordinating their schedules is essential for a smooth and efficient renovation process. Make sure to book contractors well in advance (at least three to four months) to secure their services and avoid potential delays.
Regular communication with your contractors will also help you stay informed about their progress and address any issues that may arise during the renovation.
Material Ordering
Ordering materials in advance is crucial to avoid delays and ensure the availability of your desired products. Once you’ve chosen your materials and fixtures, place your orders as early as possible. This will give you ample time for any potential backorders or shipment delays.
Be sure to coordinate the delivery dates of your materials with your renovation schedule, so everything arrives when needed.
Contingency Planning
No matter how well you plan, unexpected issues or delays can still occur during a renovation. To prepare for any surprises, allocate extra time and budget for contingencies. Having a contingency plan in place will help you navigate these unforeseen obstacles and keep your renovation on track.
Choose Your Materials and Fixtures
Selecting the right materials and fixtures is key to achieving the bathroom of your dreams. From flooring to lighting, each element should complement your design vision and meet your functional needs. Consider factors such as durability, maintenance, and budget when making your selections.
Let’s explore some popular options for flooring, fixtures, and wall and lighting options at your local home improvement store.
Flooring Options
Your bathroom flooring should be both visually appealing and practical. Some excellent choices for bathroom flooring include bathroom tiles, which are a popular option due to their durability and water resistance. Other options include:
- Vinyl: Vinyl offers a budget-friendly alternative to tile, with a wide range of styles and designs available.
- Laminate: Laminate flooring is another affordable option, offering the look of hardwood or tile at a lower cost.
Consider your budget, style preferences, and maintenance requirements when choosing the best flooring option for your bathroom.
When selecting your flooring, consider factors such as slip resistance, ease of maintenance, and overall design compatibility.
Fixture Selection
Choosing the right fixtures can elevate your bathroom’s functionality and aesthetic appeal. Consider options for:
- Sink fixtures
- Faucets
- Toilets
- Showers or tubs
that meet your needs and preferences. Keep in mind that the style, material, and finish of your fixtures should complement the overall design of your bathroom.
Don’t be afraid to splurge on high-quality fixtures, as they can greatly enhance your bathroom’s resale value when you install vanity.
Wall and Lighting Options
Wall and lighting options play a crucial role in creating a cohesive and inviting bathroom ambiance. For the walls, you can choose to paint walls, tile, or use other wall coverings such as shower walls, depending on your design preferences. As for lighting, consider a mix of ambient, task, and accent lighting to achieve the desired atmosphere.
Don’t forget to choose fixtures and finishes that coordinate well with the rest of your bathroom design.
Hire Professionals or DIY?

One of the biggest decisions you’ll face during your bathroom renovation is whether to hire professionals or take on a DIY approach. Both options have their pros and cons, so it’s important to carefully consider factors such as your experience, time constraints, and potential cost savings.
We will examine some of the key aspects of plumbing, electrical work, and fixture installation to help guide your decision.
Plumbing and Electrical Work
Plumbing and electrical work are typically best left to professionals. These tasks require specialized knowledge and expertise to ensure safety and compliance with local building codes. While DIY plumbing and electrical work may save you money on labor costs, improper installations can lead to costly repairs and safety hazards down the line.
Hiring a licensed professional can provide peace of mind and a higher quality outcome.
Installation of Fixtures and Finishes
When it comes to installing fixtures and finishes, the decision to DIY or hire professionals depends on your skill level, available time, and desired results. DIY installation can save you money on labor costs, but may require more time and effort. Additionally, if you lack experience, the end result may not meet your expectations.
On the other hand, hiring professionals can ensure a more polished final product, but may come at a higher cost.
DIY Savings vs. Professional Expertise
Weighing the potential cost savings of DIY projects against the expertise and efficiency provided by professional contractors is essential. While DIY can save you money on labor costs, it may take more time and effort to achieve the desired results. Professional contractors bring experience and knowledge to the table, ensuring a higher quality outcome in a shorter time frame.
Ultimately, the choice between DIY and hiring professionals will depend on your personal preferences, budget, and confidence in your abilities.
Obtain Necessary Permits
Securing the necessary permits to comply with local building codes and regulations is an essential step before starting your bathroom renovation. Acquiring permits may seem like a bureaucratic hassle, but it’s a crucial step to guarantee a safe and successful renovation. Depending on the scope of your project, you may need permits for:
- Structural changes
- Electrical work
- Plumbing
- Fixture additions
Consult your local building department to determine the specific permits required for your renovation.
Begin the Renovation Process

Having set goals, obtained permits, and chosen materials and fixtures, you can now commence the exciting renovation process! This phase involves demolition, plumbing and electrical updates, and installation of new fixtures and finishes. As you work through each step, keep your project timeline and budget in mind, making adjustments as needed.
We will delve into each stage of the renovation process in more detail.
Demolition
The demolition phase is your opportunity to remove old fixtures and finishes, preparing the space for renovation. Here are the steps to follow:
- Disconnect the electricity and water supply to the bathroom, ensuring a safe working environment.
- Carefully remove fixtures such as the toilet, sink, shower, and bathtub.
- Remove any wall tiles or drywall that need to be replaced.
- Be cautious not to damage any underlying pipes or wiring during the demolition process.
Plumbing and Electrical Updates
As you update your bathroom’s plumbing and electrical systems, it’s important to consider any new fixtures or layout changes that require adjustments. This may involve installing new pipes, rerouting wiring, or upgrading electrical circuits to accommodate additional lighting or outlets. If you’re not confident in your ability to tackle these tasks, hiring a licensed professional is highly recommended.
Installation of New Fixtures and Finishes
The final stage of your bathroom renovation involves installing new fixtures and finishes according to your chosen design, which is an essential part of bathroom renovations. This includes items such as:
- Sinks
- Faucets
- Toilets
- Showers or tubs
- Flooring
- Wall coverings
- Lighting
As you install each element, ensure proper functionality and a polished final result. With careful planning and attention to detail, your bathroom renovation will transform your space into a beautiful and functional oasis, making your bathroom project a success.
Summary
In conclusion, a successful bathroom renovation requires careful planning, goal setting, and attention to detail. By following this step-by-step guide, you can transform your outdated bathroom into a stunning and functional space that enhances your daily life and adds value to your home. Whether you choose to hire professionals or take on a DIY approach, a well-executed bathroom renovation will reward you with a beautiful and efficient space to enjoy for years to come.
Frequently Asked Questions
In what order do you renovate a bathroom?
When remodeling a bathroom do you do the floor first?
What do I need to know before remodeling a bathroom?
What factors should I consider when setting a budget for my bathroom renovation?
What are some common challenges to be aware of when undertaking a DIY bathroom renovation?
You must be logged in to post a comment.